gemellocattivo.com

Which means "Evil Twin". Lets see your projects where you change boring into fun or create the fun from scratch.
It is currently Sun Sep 21, 2025 4:32 am

All times are UTC - 5 hours [ DST ]


Post new topic This topic is locked, you cannot edit posts or make further replies.  [ 314 posts ]  Go to page Previous  1 ... 20, 21, 22, 23, 24, 25, 26 ... 32  Next
Author Message
PostPosted: Thu Jan 08, 2015 1:53 pm 
Offline

Joined: Thu Jan 01, 2015 6:47 pm
Posts: 4687
12-23-2007
The plan is actually quite simple, cut out what’s there now with the holes all in the wrong places and weld in new metal so I can put the holes where I want them. This is the easy part really and most of the work I’m going to be doing over the next few days will be more cosmetic than anything else. I want to get it looking like the parts were all made to be together and not an afterthought…..and that will mean changing the shape of the top part of the timing cover, shortening the 2 top covers to match and attaching them to the cam covers. None of it’s very hard, it just takes a bit of time.

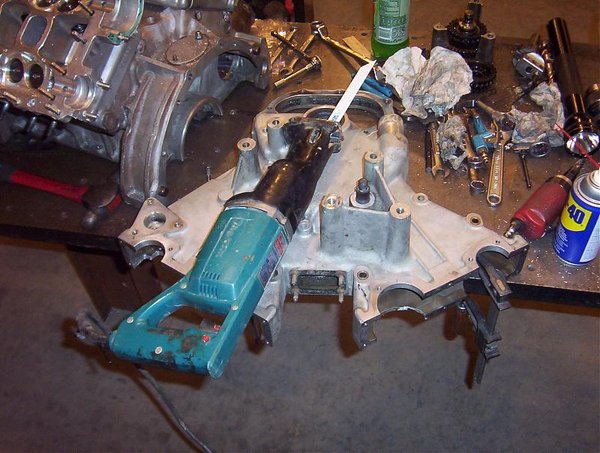
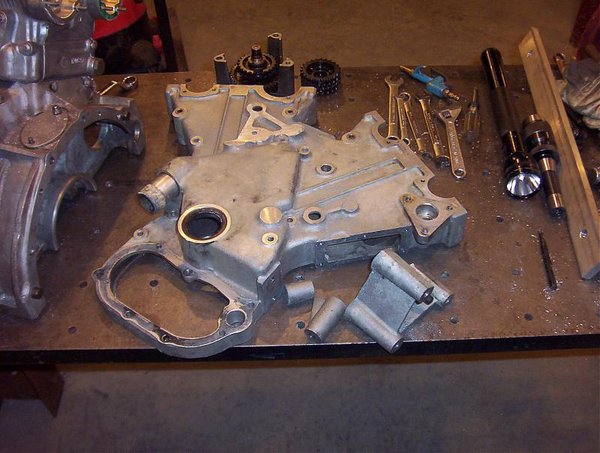
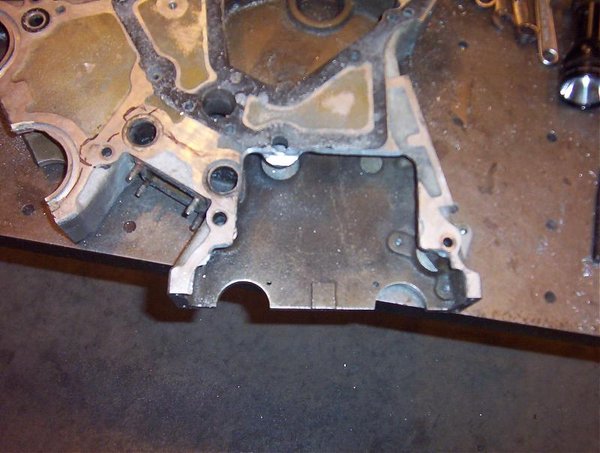
I started some of the sawing tonight (got bored with TV). I knocked off some mounts I don’t need, I still need to clean them up on the mill, but it was faster to saw than to mill the whole way. Also, here’s a picture of the hole I installed in the back of the timing cover to clear the head, it needs a piece of plate welded in now.

The last pic is where I was looking at the water situation. The 400 heads were fed by the 2 round holes in the back of the timing cover that flowed into the front of the heads. The big feed on top, just goes into the cover and then out the 2 hole into the heads. The TR heads have feeds in the middle for more even distribution so the 400 set-up isn’t much use. I’m going to just cut that hole section right out of the timing cover and run a coolant manifold/tube from the connections on the head straight out the front of the engine….of maybe straight out the back and run the oil lines in/out the front, I need to think about that, but either way I’m cutting that section out of the timing cover.


Attachments:
4 12-23-2007 011.jpg
4 12-23-2007 011.jpg [ 89.03 KiB | Viewed 15758 times ]
3 12-23-2007 012.jpg
3 12-23-2007 012.jpg [ 76.02 KiB | Viewed 15758 times ]
2 12-23-2007 013.jpg
2 12-23-2007 013.jpg [ 64.64 KiB | Viewed 15758 times ]
1 12-23-2007 010.jpg
1 12-23-2007 010.jpg [ 99.71 KiB | Viewed 15758 times ]
Top
 Profile Send private message  
 
PostPosted: Thu Jan 08, 2015 1:56 pm 
Offline

Joined: Thu Jan 01, 2015 6:47 pm
Posts: 4687
12-24-2007
I cleaned up my sawsall work this morning on the mill. Now out with that water passage I think......


Attachments:
1 12-24-2007.jpg
1 12-24-2007.jpg [ 72.59 KiB | Viewed 15758 times ]
Top
 Profile Send private message  
 
PostPosted: Thu Jan 08, 2015 1:57 pm 
Offline

Joined: Thu Jan 01, 2015 6:47 pm
Posts: 4687
12-24-2007
I picked a shape for the cover, cut it out and test fit it. I think it will look pretty good….but first I have to fill all the holes I made and move the cut-outs for the cams and that means it needs the Frankenstein treatment. Once it’s machined no one will ever know it was ever this ugly.

I have to decide how I’m going to finish it too. I can't leave it as a bare casting because it’s a pretty rough part but the machined areas are smooth so they stand right out. Wrinkle paint is the easiest I guess because it hides almost anything. It would need a quick sand but that should be about it....but I don't know if it would look right. It would probably look nice if I sand the whole thing to a satin polish similar to the original QV timing covers…..that seems like a lot of work though and the weld and plate area may be a slightly different color. I'll need to think about that.


Attachments:
3 12-24-2007 001.jpg
3 12-24-2007 001.jpg [ 67.38 KiB | Viewed 15758 times ]
2 12-24-2007 002.jpg
2 12-24-2007 002.jpg [ 82.35 KiB | Viewed 15758 times ]
1 12-24-2007 003.jpg
1 12-24-2007 003.jpg [ 70.13 KiB | Viewed 15758 times ]
Top
 Profile Send private message  
 
PostPosted: Thu Jan 08, 2015 1:58 pm 
Offline

Joined: Thu Jan 01, 2015 6:47 pm
Posts: 4687
12-25-2007
There's 1 corner fixed, 3 to go.

The bores are still small for now, I want the back cut large enough to be able to pull the cover without pulling the cams and the front bore needs to be finished with cover in place so the plug will seal properly.

Also, I need to cut some kind of pattern in so it doesn't look like I welded a plate in. After I rough in the second side, I'll decide what I think might look nice to add some shape.


Attachments:
1 12-25-2007.jpg
1 12-25-2007.jpg [ 76.33 KiB | Viewed 15758 times ]
Top
 Profile Send private message  
 
PostPosted: Thu Jan 08, 2015 2:00 pm 
Offline

Joined: Thu Jan 01, 2015 6:47 pm
Posts: 4687
12-25-2007
Quote:
Originally Posted by buzzm2005 View Post
Ahhhh.... I get it now. You just cut out the metal around the semicircle, weld in a new piece of bulk metal, and recut the semicircle to match the dimensions of the heads. I like the black Sharpie line on the left side that shows where the companion cut will be made.


yup, easy. The holes are clearance holes so they only have to be close on location. The sharpie line you see went to the band saw a couple hours ago and off came the corner. It's welded and waiting for machining now, I had to stop to do my christmas calls. I think the cover needs about 4-6 more hours. Then the cam covers.


Top
 Profile Send private message  
 
PostPosted: Thu Jan 08, 2015 2:00 pm 
Offline

Joined: Thu Jan 01, 2015 6:47 pm
Posts: 4687
12-25-2007
Art,
It goes fast because I'm pretty sure I've got OCD and just work on it a lot

Jerry was the man back in the day. What I found was he understood business though....he developed a port and everyone with that engine got the same thing regardless of what you were building. Jerry also like constant diameter ports which I’ve since learned are really not the best way to go, time marches on I guess.


Top
 Profile Send private message  
 
PostPosted: Thu Jan 08, 2015 2:05 pm 
Offline

Joined: Thu Jan 01, 2015 6:47 pm
Posts: 4687
12-25-2007
I gave the cover a good look over today and it looks like ferrari blasted it with something course, sand probably. They ground parting line and flash all over the place and them blasted the whole thing to make it look uniform. That’s an option.

I don’t know anything about tumbling I’ll have to look into that.


I'll probably end up doing a semi-polish because I want it to look QV stock, but I kind of like the red TR cam covers so I could just keep right on spraying


Top
 Profile Send private message  
 
PostPosted: Thu Jan 08, 2015 2:05 pm 
Offline

Joined: Thu Jan 01, 2015 6:47 pm
Posts: 4687
12-25-2007
Thanks.

I'm hoping to do another test fit in the car in about a week before I get going on the trans adapting. I'm going to try and rough everything in before doing much finish work on anything.

Mark


Top
 Profile Send private message  
 
PostPosted: Thu Jan 08, 2015 2:06 pm 
Offline

Joined: Thu Jan 01, 2015 6:47 pm
Posts: 4687
12-26-2007
After a little digging it looks like a vibratory machine would be the way to go....but to buy one big enough is a tad pricey, $2100 was the best I found. I guess I could make something for a few hundred dollars....or I could sand.....


Top
 Profile Send private message  
 
PostPosted: Thu Jan 08, 2015 2:08 pm 
Offline

Joined: Thu Jan 01, 2015 6:47 pm
Posts: 4687
12-26-2007
Quote:
Originally Posted by Tillman View Post
Heh. Spray it all green as is and paint stitches on the weld marks


Oh come on, it's not that bad.

I pretty much finished the 1st side of the timing cover tonight. I need to add some radius work, but I didn’t have the cutter I wanted to use. Then I gave is a quick hit with the sander for Tillman to hide the welds


Attachments:
2 12-26-2007 001.jpg
2 12-26-2007 001.jpg [ 77.95 KiB | Viewed 15758 times ]
1 12-26-2007 002.jpg
1 12-26-2007 002.jpg [ 89.38 KiB | Viewed 15758 times ]
Top
 Profile Send private message  
 
Display posts from previous:  Sort by  
Post new topic This topic is locked, you cannot edit posts or make further replies.  [ 314 posts ]  Go to page Previous  1 ... 20, 21, 22, 23, 24, 25, 26 ... 32  Next

All times are UTC - 5 hours [ DST ]


Who is online

Users browsing this forum: No registered users and 295 guests


You cannot post new topics in this forum
You cannot reply to topics in this forum
You cannot edit your posts in this forum
You cannot delete your posts in this forum
You cannot post attachments in this forum

Jump to:  
cron
Powered by phpBB® Forum Software © phpBB Group